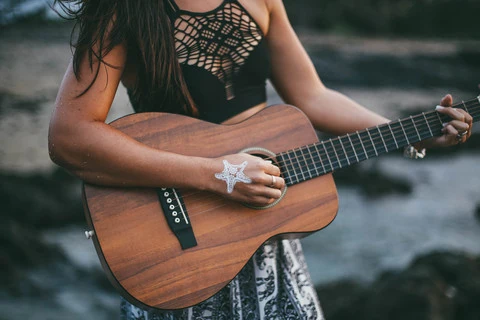
Temporary Tattoo Collection Donates 50% to Animal Rescue!
Posted on

Posted on
Posted on
Forearms are one of the most forgiving spots for tattoo experimentation. The flat canvas gives you room to play with scale, repetition, and small visual stories — whether you're prepping for a Laneway set, kicking back at a St Kilda arvo, or just want a touch of wearable art for the weekend.
The trick to getting a multi-piece arrangement to feel intentional is treating it like a designer would treat a sketchbook page. Choose a focal point, build supporting visuals around it, and keep the negative space breathing. Skip the random placement — your arm deserves the same thoughtful composition a Melbourne muralist puts into a Hosier Lane wall.
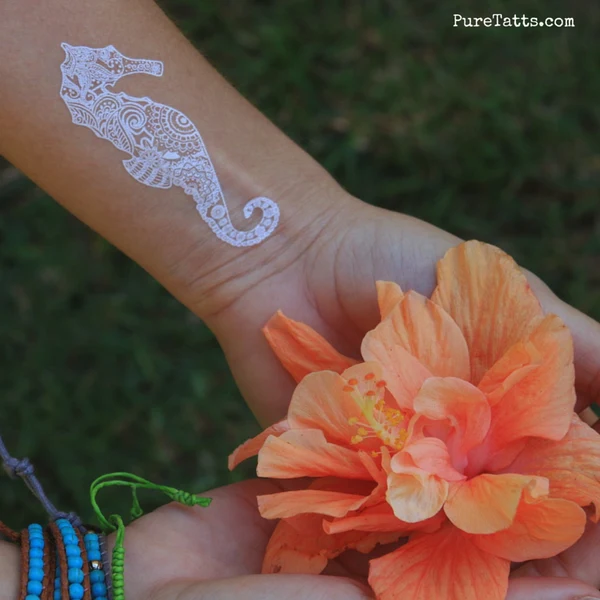
A great starting point is mixing finishes. White, matte black, and traditional black-and-grey pieces sit beautifully together, creating depth and contrast across the skin. Once you've nailed that trio, the rest of the design almost composes itself.
The canvas should be clean, dry, and lightly exfoliated. Skip the heavy moisturiser on the day — oils shorten how long any temporary piece survives. A quick swipe with a face wipe, a few minutes of air-dry, and you're set.
If you've just been swimming at Bondi or sweating through a coastal walk, wash your arm with plain soap first. Salt and chlorine both interfere with how well transfer paper releases. Pat rather than rub, and let the skin breathe for a couple of minutes before placing anything.
Hair gets in the way more than most people expect. If your forearms are fuzzy, shave the day before rather than the morning of application. Freshly shaved skin can sting under certain adhesives, so a day-old shave is the sweet spot.
Your forearm has natural curves and a long sight line — use them. Wrap pieces around the wrist, let a single motif climb from inside elbow toward the bicep, or echo symmetrical shapes on either side of the arm. The eye loves symmetry, but it also loves leading lines walking from one part of the body to another.
A cheap way to plan is to print the designs at home, cut them out, and lay the paper versions on your skin before peeling any backing. This dry run takes five minutes and saves you from sticky regret. Move the cuts around until something clicks, snap a quick photo for reference, then apply top-down.
If you're after a clean, grid-aligned look, tape the layout to your arm with small pieces of washi tape before committing. For something looser and organic, don't fight the placement — let each piece find its own spot and trust the layered effect to feel curated.
Start with the largest piece — that's generally your focal motif. Place it first, smooth it firmly with a damp cloth, and wait thirty seconds before peeling the backing. Patience here means less smudging later. Once the centrepiece is fixed, work outward in concentric rings, alternating styles so two of the same finish never sit side by side.
This stacking framework keeps the overall look balanced and helps you decide what to add next, since each layer affects how the surrounding pieces read.
| Finish Type | Visual Effect | Best Pairing | Wear in Aussie Heat |
|---|---|---|---|
| Matte Black | Soft, velvety depth | White henna-style detail | 4-6 days |
| Classic Black Ink | Crisp and illustrative | Geometric linework | 5-7 days |
| White Ink | Bright, accentuating touch | Matte black base | 3-5 days |
| Metallic Silver | Subtle shimmer | Simple line motifs | 3-4 days |
Finish with a light mist of setting spray or a barely-there layer of unscented deodorant over the top. Australian humidity will test any tattoo, and a sealed piece stays vibrant longer through a long summer arvo. Knowing the wear time of each finish also helps you plan a refresh day before anything visibly fades.
A successful collage rarely depends on a single design language. Contrast creates visual interest, and contrast comes from mixing textures. A purely black-and-grey arrangement reads crisp and modern — throw in a white motif and the same arm suddenly looks like a layered gallery wall, with highlights bouncing off the dark base.
Matte black pieces are a brilliant anchor for this kind of look. Their velvety finish sits beautifully against fine geometric linework and gives white embellishments something to pop against. Place one big matte shape on the inside of the forearm, then orbit smaller motifs around it and the whole collage feels grounded.
If you want a touch of nostalgia in your arm story, vintage motifs travel surprisingly well alongside contemporary shapes. Something like vintage tattoo patterns brings an Art Deco quality that pairs with modern lines, especially when offset by clean negative space. The result reads curated rather than cluttered.
The biggest mistake is rushing. Each piece needs its own pressing time, and if you peel one too early to chase the next, edges lift and the entire arrangement looks tired by the end of the night. Slow down and treat each transfer like its own small project.
Another common slip is ignoring skin folds. A piece placed right on the crease of your wrist will lift within a day, no matter what you do. Anchor designs onto flatter, less mobile areas — upper inner forearm, outer arm above the elbow — and reserve smaller motifs for the bendy zones.
Over-cluttering is the third classic trap. A collage should breathe. Three or four well-chosen designs often look more intentional than eight squeezed motifs competing for attention.
Australian summer is no joke, and your arm will cop sun, sweat, and saltwater faster than you think. Sunscreen is your friend, but apply it around tattooed zones rather than directly over them. Some chemical sunblocks interfere with the inks, and oily formulas shorten the life of any temporary piece.
After a swim, rinse with fresh water and pat dry. Long arvo floats at the local pool are fine, but a quick refresh afterwards keeps edges crisp. Avoid scrubbing with a towel — dabbing with a soft cloth is far gentler on the inks.
If you're heading to a festival like Laneway or a long weekend at Falls, pack a small touch-up kit. A few spare transfer sheets, a wipe, and a tiny spray bottle take up almost no room in a tote, and you'll be grateful if a piece starts to peel mid-set.
A finished forearm collage looks just as at home at a Newtown brunch as it does at a coastal walk. Treat the arm like a styling piece — roll up a long-sleeve tee to frame the focal point, or wear a sleeveless option with confidence. The arm becomes part of the outfit.
If you're not ready to commit to ink long-term, this kind of layered aesthetic is the perfect test run. You can wear a piece for a few weeks, see how it sits in your wardrobe, then change the entire arrangement next month without a single regret.
When you're ready to start building, the matte black tats collection is a beautiful place to begin. Pick a centrepiece, grab a couple of geometric lines and a white embellishment, and lay them down one by one. By the time you're done, your forearm will look like a tiny, wearable gallery — and the whole thing came together in under an hour.
Posted on
Posted on
Posted on

Posted on

Posted on

Posted on
Posted on