Temporary Tattoo Collection Donates 50% to Animal Rescue!
Posted on

Posted on
Posted on
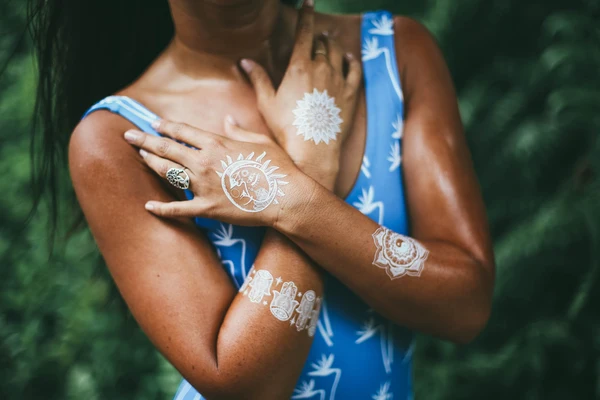
Temporary tattoos can look remarkably realistic when they sit smoothly against the skin. Curved areas, however, require a little more planning than flat placement on the forearm or thigh. Wrists, ankles, shoulders, collarbones, calves, and ribs all move or taper, which can create creases during application.
The key is to match the design to the body area, prepare the skin carefully, and apply the tattoo in stages rather than pressing the whole transfer down at once. A detailed black, white, or matte black design needs a smooth surface so its fine lines remain crisp.
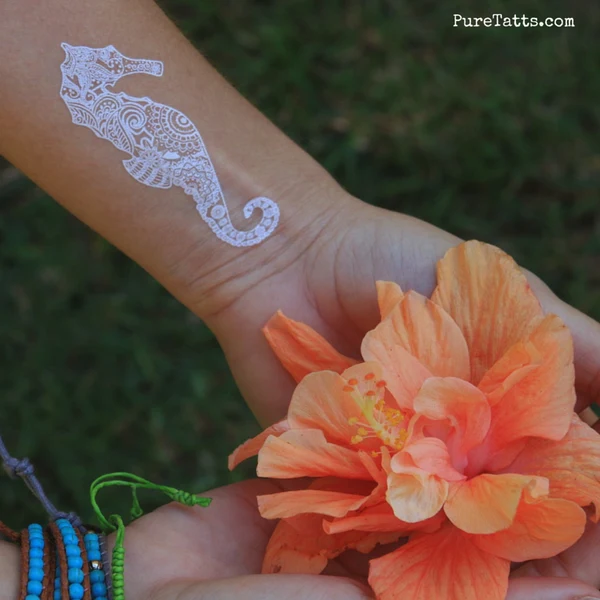
With the right technique, curved placement can make a temporary tattoo feel intentional and balanced. Artist-made collections from Pure Tatts offer plenty of detailed designs to test across different parts of the body before committing to permanent ink.
Start by examining the shape and movement of the area. A small tattoo usually works better on a narrow curve such as the wrist, ankle, or side of the neck. Larger designs can suit the shoulder, upper arm, calf, or ribs, where there is more surface area for the transfer to settle.
Avoid placing a detailed temporary tattoo directly over a deep crease, knuckle, elbow point, or constantly folding joint. Movement in these areas can break the design into visible wrinkles and may cause the edges to lift early. Positioning the tattoo slightly beside the fold often creates a smoother result without changing the intended look.
Consider the direction of the curve as well. A vertical design may follow the length of the calf or forearm, while a horizontal motif can trace the collarbone or shoulder. Turning the design to work with the body’s natural lines helps it appear more like intentional body art.
Clean, dry skin gives the adhesive the best chance to bond. Wash the area with mild soap, rinse away any residue, and dry it completely with a lint-free towel. Oils, body lotion, sunscreen, and perspiration can prevent the tattoo from transferring evenly.
Hair can also interfere with close contact between the design and skin. The area does not always need to be shaved, but trimming or choosing a less hairy placement can improve detail and longevity. Apply the tattoo before moisturizing, exercising, or swimming.
Hold the transfer against the skin before removing its protective film to check the position. Curved areas are easier to assess when the body is relaxed and held in a natural posture. Avoid stretching the skin tightly, since it will return to its original shape and may distort the design after application.
Remove the clear protective sheet and place the tattoo face down. On a curved area, make initial contact at the design’s center or the flattest section first. Then guide the surrounding parts into place, pressing outward gradually instead of laying the entire transfer down in one motion.
Use firm, even pressure with a damp cloth or sponge. Work from the middle toward the edges, following the body’s curve with your fingers. This pushes out small air pockets and reduces the chance of folds forming in the transfer paper.
For a very rounded placement, gently press one side down before the other. If the design is wide, do not force both edges to meet the curve at once. Small, controlled movements are less likely to stretch fine lines or cause a geometric pattern to lose its symmetry.
Keep the transfer still while it becomes fully saturated. After the recommended waiting time, peel the backing paper away slowly from one corner. If a section has not transferred, lower the paper again, dampen it briefly, and press rather than pulling harder.
Each body area has a different combination of movement, texture, and curvature. The best technique depends on whether the surface rolls around the body, bends at a joint, or stretches during ordinary movement.
| Body Area | Main Challenge | Best Application Approach | Design Style That Works Well |
|---|---|---|---|
| Wrist | Frequent bending and hand movement | Place just above the main crease and press from the center outward | Small geometric marks or narrow linework |
| Ankle | Rounded bone and shoe friction | Apply to clean, dry skin away from sock edges | Compact symbols, bands, or minimal motifs |
| Shoulder | Sloping, rounded surface | Anchor the center first and smooth toward the upper arm | Bold botanical or angular designs |
| Collarbone | Narrow ledge with changing angles | Follow the bone’s direction and avoid the deepest hollow | Fine linework and elongated shapes |
| Calf | Broad curve that narrows toward the ankle | Align the design vertically and smooth each side separately | Medium-to-large illustrative pieces |
| Ribs | Flexible surface that expands with breathing | Apply while standing naturally without pulling the skin | Flowing designs with open negative space |
When placing a tattoo near clothing, think about friction before applying it. A design under a tight sock, bra strap, watchband, or waistband may fade faster than one left exposed. The tattoo can still work in that location, but positioning it just outside the highest-friction area will usually preserve the details longer.
Let the design dry undisturbed after removing the backing paper. Avoid rubbing it with a towel or checking the edges repeatedly. A light layer of water may leave the surface looking dull at first, but the ink generally becomes clearer as it dries.
For the first few hours, keep the area away from oils, creams, heavy sweating, and prolonged water exposure. When showering, let water run over the tattoo without scrubbing it. Pat the skin dry instead of dragging a towel across the design.
Curved areas often experience more contact than flat ones, so sleepwear and daily accessories matter. If the tattoo is on the wrist, remove a tight watch temporarily. For ankle designs, choose footwear that does not repeatedly rub the transfer while it sets.
Wrinkles usually develop when the transfer is pressed onto the curve all at once. If the paper begins to crease before it is wet, lift it carefully and reposition the center. Once the backing has been saturated, avoid shifting the design because partial movement can blur its edges.
If a section looks faint, the skin may have contained lotion or the transfer may not have received enough moisture. Press the damp cloth against that section for several more seconds. Do not scrape or rub the area, as friction can remove newly transferred detail.
A tattoo that looks uneven after drying may be affected by skin movement rather than a poor transfer. Designs placed directly over joints and deep folds commonly distort when the body bends. For the next application, move the design beside the crease or choose a smaller version with more open space.
A short preparation routine makes curved-skin application more predictable. These steps are especially useful when applying a detailed temporary tattoo with thin lines, geometric symmetry, or contrasting black-and-white elements.
Temporary body art is a practical way to test scale, placement, and style before making a longer-term decision. Apply a few designs to different curved areas, photograph the results in natural light, and wear the most successful placement with confidence. Browse the latest Pure Tatts designs and choose a transfer that follows your body’s shape rather than fighting it.
Posted on
Posted on
Posted on

Posted on

Posted on

Posted on
Posted on